Hello, I'm Fran, the proud owner of Lelloliving, an online homewares brand born out of my 12-year journey in the furniture business as an interior designer and furniture manufacturer.
Having initially delved into the world of upcycled furniture with painted furniture, I evolved into a full-time furniture designer working with live edge wood, resin and other material. Through my extensive experience, I've learned valuable lessons from a few missteps along the way.
Today, I'm here to share some crucial insights on avoiding common mistakes when painting furniture.
9 Mistakes to Avoid When Painting Furniture:
-
Neglecting Surface Preparation:
-
Mistake: Overlooking the importance of surface preparation.
-
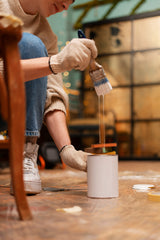
Fran Says: Preparation is one of the most commonly forgotten steps. Shiny surfaces need to be sanded to give the paint a 'key' (a surface for the new paint to cling to), along with any bumps, flaky finish or damage or they'll show through.
It's also surprising how much dirt builds up on a piece and how much even invisible marks can affect your finish.
We have a problem on the stairs to our office where something invisible splattered on the wall and has bubbled the paint. It could have been avoided with a simple wash. Give your whole piece a thorough clean before you start!
-
Tip: Ensure to sand shiny surfaces to create a 'key' for the new paint. Smooth out bumps, address flaky finishes, and repair damages before starting.
-
-
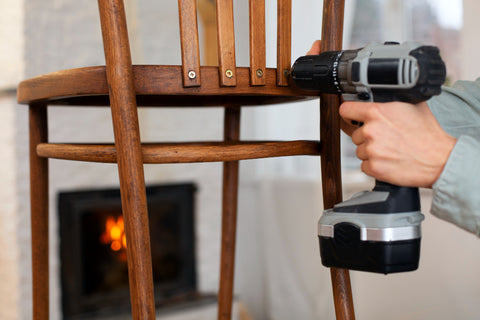
Incomplete Furniture Preparation:
-
Mistake: Not thoroughly preparing the entire furniture piece.
-
Fran Says: Old furniture needs to be thoroughly cleaned. Then hardware needs to be taken off, drawers taken out and tape put down where you need neat edges (drawers, edges of cupboards, any glass, or any paint transitions. It stops unsightly drips, rough edges and messy painted hardware which makes a piece look amateurish.
Hinges should also be taped or removed as painted hinges will crack when they move. The crisp edges where you've created will make your piece look subtly classy.
A little bit of time spent here will make finishing the piece so much quicker.
-
Tip: Clean old furniture meticulously, remove hardware, and use tape strategically for clean edges. Taking the time here pays off in a more professional finish.
-
-
Incorrect Use of Paint:
-
Mistake: Applying paint without considering the type and need for a primer.
-
Fran Says: chalk paints can be put directly onto most finishes, but most other paints need a primer if you want long lasting finish. Primer also stops tannins from wood, knots or dark colours from bleeding through the paint.
Your paint also needs to be the right consistency as it can thicken over time, it should have the consistency of heavy cream and run off your stirrer after you've stirred it.
Additives such as Floetrol, thinners, spirits or water can be added depending on the specific type of paint (latex, Acrylic, Oil or chalk/water based paints) for an even finish.
-
Tip: Use the right paint for the job, and understand that most paints, except chalk paints, require a primer for longevity. Check and adjust the paint consistency for smooth application.
-
Mistake: Applying paint without considering the type and need for a primer.
-
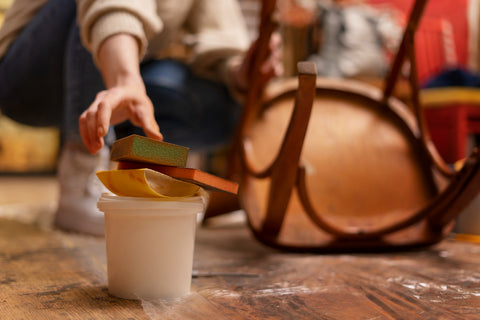
Inadequate Painting Tools:
-
Mistake: Using subpar brushes or tools for painting.
-
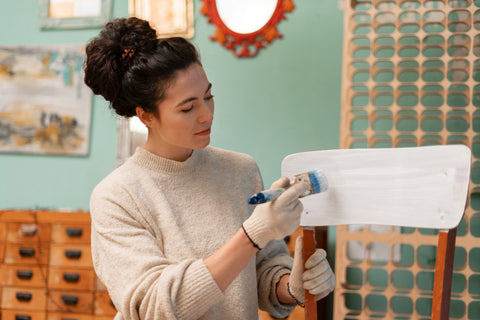
Fran Says: Don't use any old paintbrush, a good quality smooth paintbrush will leave your piece with a silky smooth finish and make your paint glide on. A roller for smooth surfaces gives smoother finishes on larger surfaces.
If you want a completely flawless finish, then an air sprayer is your friend. You'll need to add an extra level to your preparation for spraying because literally anything that isn't taped or covered in paper will be coated (including anything else in the area!) and the air will blow poorly stuck tape right off if you're not careful.
I have a few paint splattered mugs from spraying my kitchen where it got through the seams on my cabinet doors (despite tape and paper) as testament to the power of a good air sprayer.
-
Tip: Invest in quality brushes and tools. A smooth paintbrush ensures a silky finish, while a roller is ideal for larger surfaces. Air sprayers are excellent for flawless finishes but require careful preparation.
-
Mistake: Using subpar brushes or tools for painting.
-
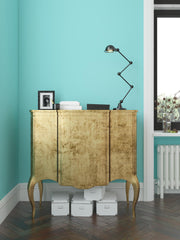
Overlooking Finishing Touches (handles and hardware) :
-
Mistake: Neglecting the impact of hardware on the overall transformation.
-
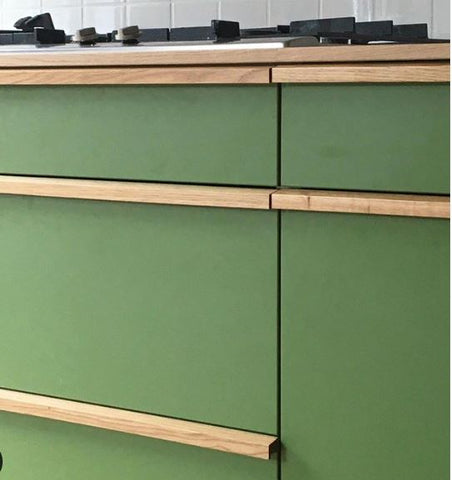
Fran Says: Just because a piece is old, doesn't mean you need to cling to the old hardware or pay homage to parts that don't serve you now.
A piece can be given a completely new lease of life if you couple the paint with a good quality hardware upgrade.
My current business Lelloliving was actually founded around the principle of adding handmade hardware to old pieces properly completes a transformation. We have a whole wooden handle section for just this job!
-
Tip: Upgrade hardware to breathe new life into old pieces. At Lelloliving, we've built our business around the transformative power of adding handmade hardware.
-
Mistake: Neglecting the impact of hardware on the overall transformation.
-
Ignoring the Finish:
-
Mistake: Underestimating the importance of a proper finish.

-
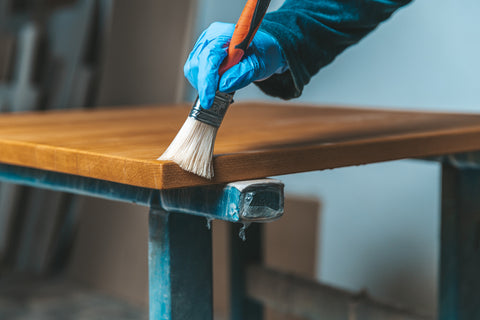
Fran Says: This is one of the other most commonly forgotten steps. Most paint finishes are not tough enough on their own, even finishes such as milk paint (i recommend this one) or mineral paint which say they don't need a sealer will eventually chip if not sealed in high traffic areas. So give them a helping hand and they'll stay looking great for a long time!
Chalk paints can be sealed with wax. For a tougher finish or any surfaces that will have objects on them need a sealer to add a hard shell to stop your paint chipping.
Polyurethane is the most common durable topcoat. I use melamine lacquer on anything in the kitchen or bathroom as these rooms are really tough environments, it also makes them wipe clean too. We also use lacquer on our wooden handle range so they are as durable (or more!) as the furniture itself.
-
Tip: Many paint finishes need additional protection. Seal chalk paints with wax and use durable topcoats like polyurethane for added resilience, especially in high-traffic areas. Don't forget to seal bare wood, it's just as important as paint!
-
Mistake: Underestimating the importance of a proper finish.
-
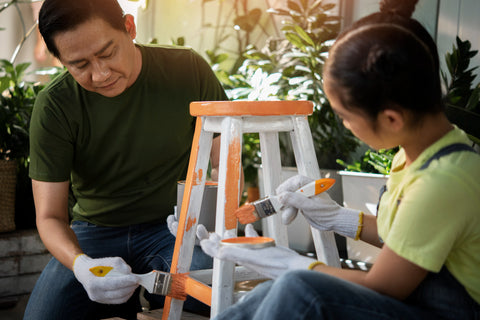
Using Painted Furniture Too Soon:
-
Mistake: Failing to allow sufficient curing time for the finish.
-
Fran Says: A lot of finishes need time to properly cure, and can't be recoated for at least a day or two. Latex paints and lacquers need 30 days+ to fully harden and this is where damage can be easily avoided if you're looking for a clean finish.
Good finishes come to those who wait!
- Tip: Patience is key. Some finishes need days to cure properly. Avoid recoating too soon, especially with latex paints and lacquers, which require 30 days or more for optimal hardness
-
Mistake: Failing to allow sufficient curing time for the finish.
8. Overlooking Sanding Between Coats:
-
Mistake: Neglecting to sand between paint coats.
-
Fran Says: Not only do good finishes come to those who wait, good finishes come to those who put in the effort between coats, sanding your piece can even out any bumps or thicker areas of paint which will show through, and key the next coat so its sticks better.
You'll be surprised by how much of a difference it makes, a well sanded piece can generate a level of smoothness that's almost on a level with a sprayed piece.
- Tip: Achieving a smooth and flawless finish requires sanding between coats. This step removes imperfections, ensures even application, and allows subsequent coats to adhere better. Take the time to sand for a professional result.
9. Not Thinking About the Future:
-
Mistake: Upcycled furniture has definite trends, don't get left behind but forge your own path
-
Fran Says: Upcyling has been a rising trend for a decade or more now, long enough for there to be some overused themes.
Rather than follow a trend and risk your pieces looking dated very soon, pick colours and styles that go with your room - be a little bold with it and have fun.
Get the family involved and create something that has memories and a special value to you.
-
Tip: Injecting a touch of personal flair can set your upcycled furniture apart. Consider incorporating unique details, whether it's a distinctive colour palette, unconventional patterns, or even a custom stencil.
This way, your creations won't just follow trends but will become timeless pieces that harmonize with your style. Don't be afraid to let your imagination run wild and infuse your furniture with a dose of individuality!
Conclusion:
Now armed with insights into common furniture upcycling mistakes, you're ready to embark on your DIY projects with confidence. Whether you're a seasoned upcycler or just starting, remember that each piece holds unique potential.
For an extra touch of sophistication, explore Lelloliving's exquisite range of furniture hardware to elevate your creations. Our handmade hardware adds the perfect finishing flourish, transforming your upcycled furniture into bespoke, stylish statements.
Painting furniture is an art that requires careful consideration and meticulous execution. By steering clear of these common mistakes, you can elevate your pieces, ensuring they not only look high-class but also stand the test of time. And remember, when it comes to painting, the wooden handle of your brush might just be your secret weapon for achieving a flawless finish.
Remember, patience and attention to detail are key when transforming old pieces into refreshed, stylish additions to your space.
Happy upcycling!